
How to Create Your Own Hoop Embroidered Pocket - Tutorial!
If you are into crafting of any sort, there is always the need for storage, so why not add a little fun and creativity into the mix? Here is a fun and clever way to store extra stash you may have lying around!
Here Are The Items That You Will Need...
- 12" by 12" hoop
- 14" by 14" floral fabric for the backing on hoop
- 15" by 14" Heavy weight muslin (15" long by 7" tall when folded)
- Medium weight cut away stabilizer
- Four Fanciful Flowers Border Embroidery Pattern
- Ruler
- Erasable pen

How To Make It
(A Video is Also Available at the End of this Article)
Step 1
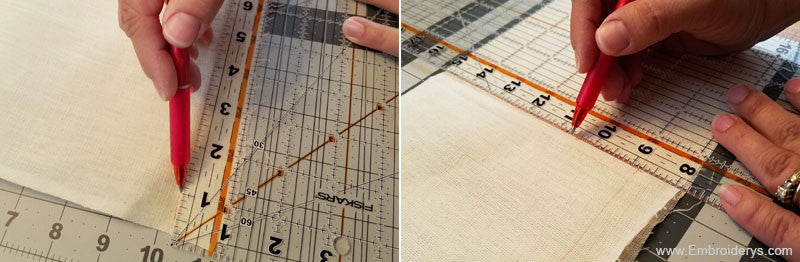
First, we start by pulling all our materials together. Next, with the muslin fabric that we are embroidering on, we measure and mark a line 1" from the bottom of the fabric with the erasable pen. Following that, we are going to find the vertical center for the placement of the pattern by folding the material in half. Finally, we will then hoop the stabilizer and fabric, matching our center mark lines of the fabric to the hoop center mark lines.
Step 2
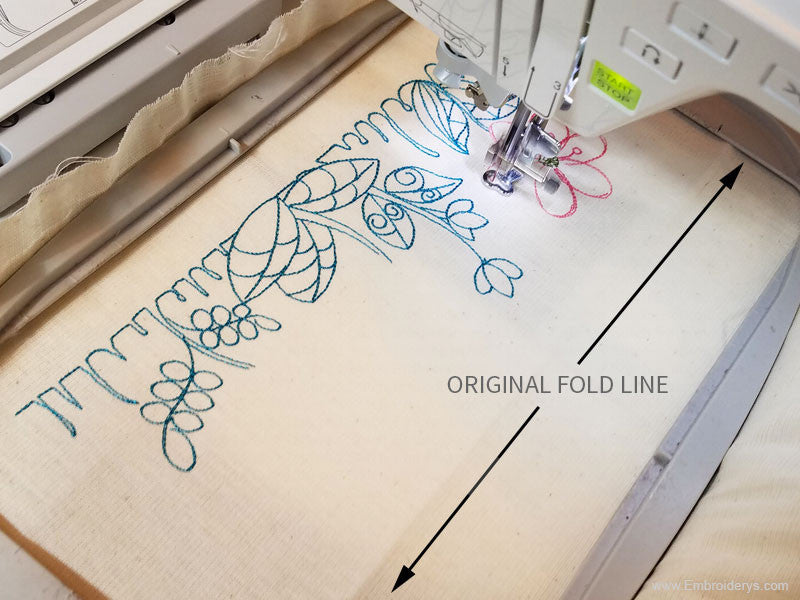
Next we will go ahead and stitch out our pattern. When this is complete, we will then fold the muslin back in half again. You can see in the photo below where the original fold was in the fabric before we hooped. That is where you will re-fold the material.
Step 3
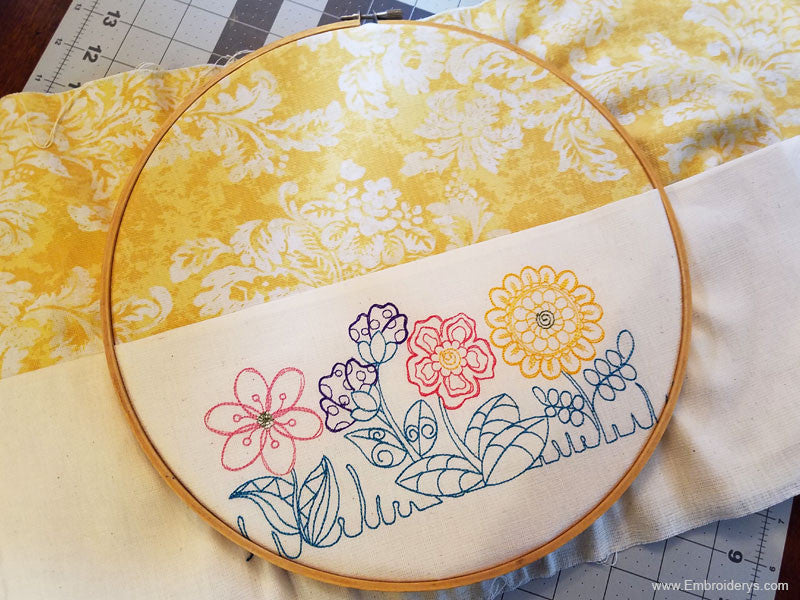
With the fold facing up, we will then layer and hoop together the background fabric along with our embroidered fabric. The embroidered piece is now what creates the pocket. After we have hooped our fabrics, we then simply flip it over in order to trim away the excess materials. That's it!
Recent Posts
-

Hurricane Helene Fundraiser - Lets Help
Hurricane Helene - Lets Help Hi all, it has been a while since we have done a fundraiser and with …Oct 4th 2024 -

The Four Basic Types of Stabilizers!
The Four Basic Types of Stabilizers!Check out how they are used via our infographic below. …Sep 23rd 2024 -

Our 5 Most Popular Projects! - Tattered Stitch Embroideries
Want to view some of our most popular in-the-hoop designs? Look no further!...Placemats - https://ww …Dec 14th 2023