
Creating Your Own Embroidered Headband Slider Tutorial!
A headband slider is a very simple yet amazingly cute way of customizing that hair retaining device we've all come to know and love!
In it's purest form, a headband slider is simply a crafty attachment that literally slides on to your headband, along with enough friction to help keep it in place.
In the following tutorial we are expanding that definition by including that wonderful craft we all have grown a passion for... embroidery! For this example, we are going to use a machine embroidered design that is both cute and fun to create... not to mention, quite easy!
(You may also view a quick video at the end of this article.)

Step 1
Start by using a medium weight tear away in your hoop, with just enough tension to keep the material taught. Place the hoop in your machine and start by stitching the initial outline of the pattern. This will act as an anchor for the design.
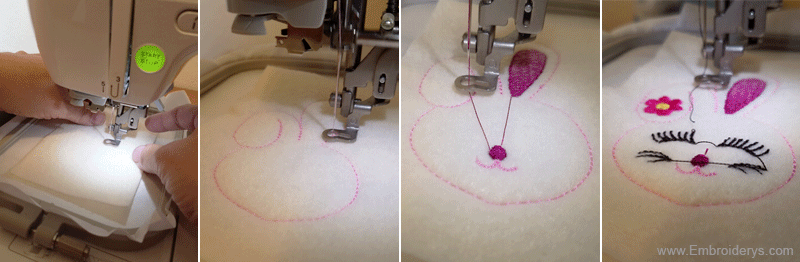
Next, using the 'In the Hoop' pattern of your choice, start by stitching on an initial square of felt on top.
You can use painters tape to help keep the felt in place till the stitch is complete... but in our case, we simply used the presser foot on the embroidery machine to hold the material down, along with our hands, till enough stitches were in place to keep the material from moving.
This is the step where the main part of the design will be displayed for all to see. You'll want to refer to your thread chart during this stage so you can be sure of the colors. However, more advanced crafters have enough experience to choose a color palette of their choice if they so desire.
Step 2
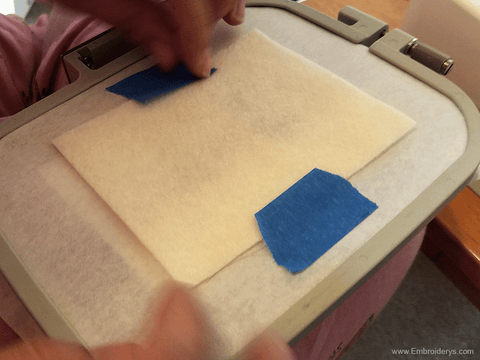 For the next step, you'll want to remove your hoop from the machine, then flip it over and place a second piece of felt down of roughly the same size.
In this case we highly recommend using something to adhere it temporarily till the design is fully stitched out.
Again, we like to use painters tape for its simplicity, easy availability, the fact that it is inexpensive and of course re-usable for a given period of time.
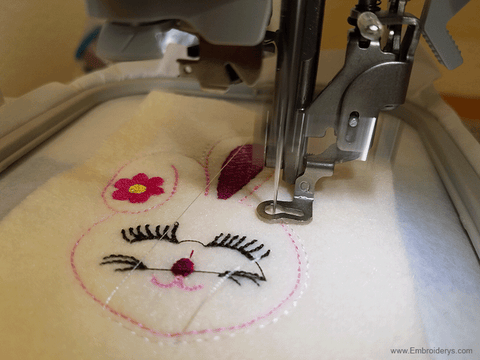
Place the hoop back in the machine to continue the final outline stitch of the piece.
This is where the 'pocket' of the design takes place.
Once complete, this will be what is providing the opening for the entry and exit of the headband itself.
Step 3
The last step is simply to cut out your design from the extra surrounding felt. A good rule of thumb is a distance equal to the to distance of the two outlying stitches.

That's it! You'll end up with a headband slider that is both adorable and highly adaptable to a myriad of situations... birthdays, holidays and many more!
Check Out the Video!
Stay tuned for more great articles from Tattered Stitch Embroideries. As always you can Sign Up to Our Newsletter and get the latest offerings as they happen!
Recent Posts
-

Hurricane Helene Fundraiser - Lets Help
Hurricane Helene - Lets Help Hi all, it has been a while since we have done a fundraiser and with …Oct 4th 2024 -

The Four Basic Types of Stabilizers!
The Four Basic Types of Stabilizers!Check out how they are used via our infographic below. …Sep 23rd 2024 -

Our 5 Most Popular Projects! - Tattered Stitch Embroideries
Want to view some of our most popular in-the-hoop designs? Look no further!...Placemats - https://ww …Dec 14th 2023