
Create Your Own In-The-Hoop 3D Embroidery Tutorial
Embroidering in three dimensions seems to be all the rage, and embroidery has taken on this trend with a vengeance.
This week we have released two beautiful organza flower sets that layer up for that 3-D effect. These flower sets, available in two sizes are are fun, easy to make and are very versatile. You can make an organza flower wreath, dress up gift boxes, turn them into dangling ornaments, or make a bunch and throw them into a pretty bowl for display. The possibilities are endless!
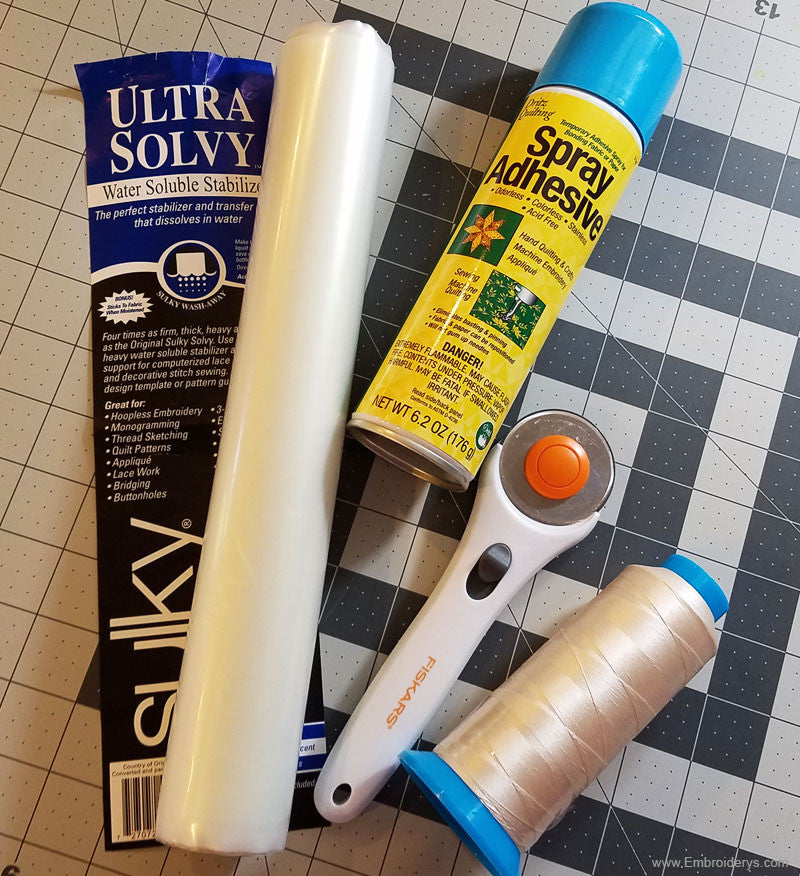
Here Are The Items That You Will Need
(Video is Also Available at End of Article)...
- Pretty Petals machine embroidered pattern
- Whimsical Bloom machine embroidery pattern
- Organza
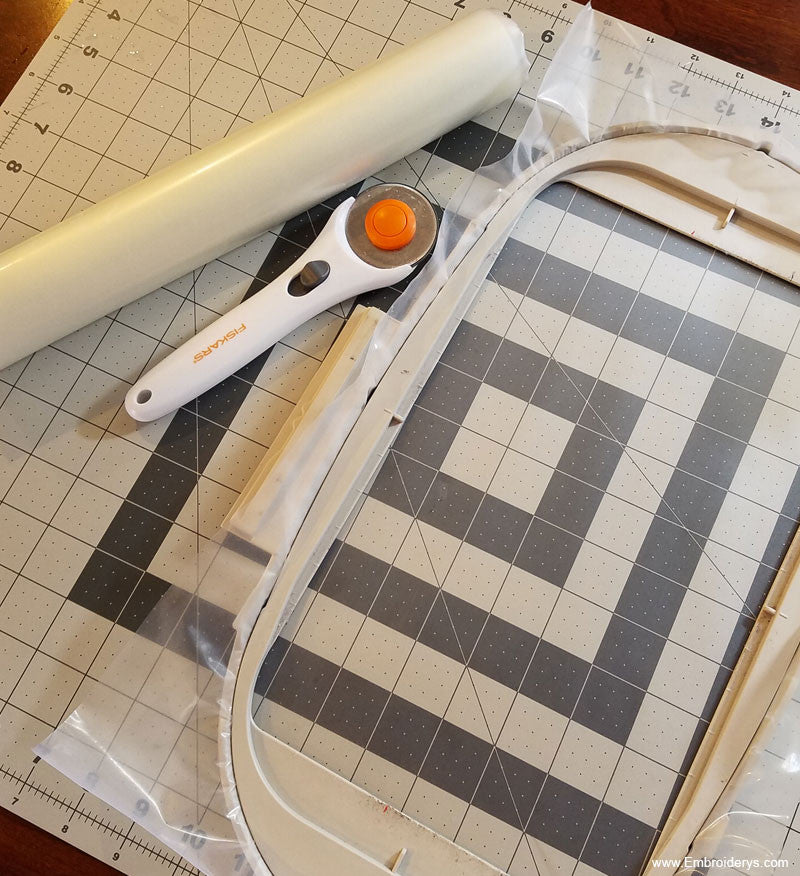
- Sulky Ultra Solvy (Water Soluble Stabilizer), heavy weight
- Spray adhesive
- Thread
- Cutting tool
- Ruler
- Cutting mat
Step 1
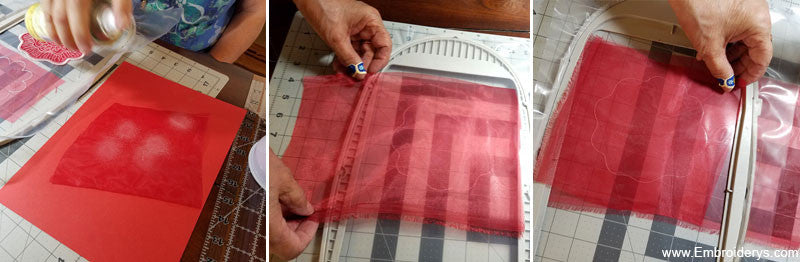
As this is an In-the-Hoop project, we will begin first by hooping our water soluble stabilizer. Next, we place the hoop into machine and run the first outline stitch.
Step 2
Next cut organza a little larger than the outline of the flower, (cut two pieces). Spray one piece of organza and press onto outline of flower that has been stitched out. Spray second piece of organza and press flat to the the back of hoop. You will want to make sure that the right sides of the fabric are facing out. Stitch out second outline.
Step 3
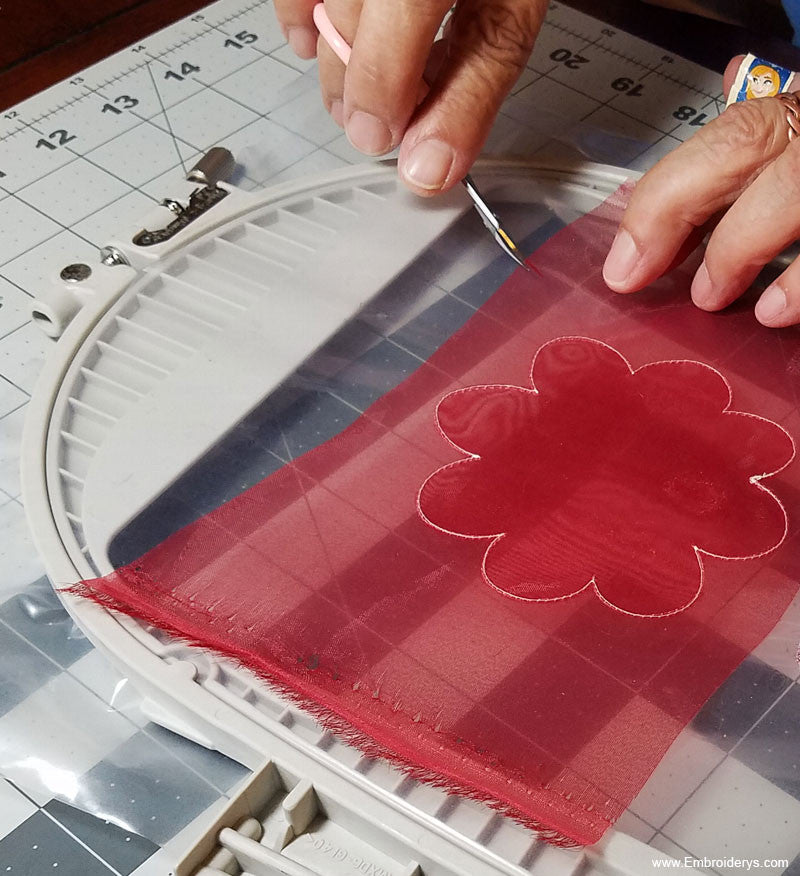
Once second outline is finished stitching, trim away excess organza from both the front and back of the organza flower.
Step 4
Place back into the hoop and stitch out your final outline and detail work of the flower. Repeat entire process for the leaves as well.

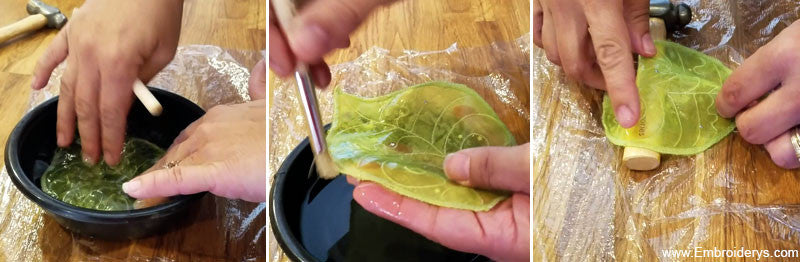
Step 5
Now for the fun (and slightly messy part). Once your flowers have been trimmed away from the stabilizer, dip the flowers into water and remove excess stabilizer away from edges using a stiff paintbrush or your finders. Then place over something or into a Styrofoam cup for molding. Once dry, adhere together by sewing a button into the center.
View the Video Version of This Tutorial!
Recent Posts
-

Hurricane Helene Fundraiser - Lets Help
Hurricane Helene - Lets Help Hi all, it has been a while since we have done a fundraiser and with …Oct 4th 2024 -

The Four Basic Types of Stabilizers!
The Four Basic Types of Stabilizers!Check out how they are used via our infographic below. …Sep 23rd 2024 -

Our 5 Most Popular Projects! - Tattered Stitch Embroideries
Want to view some of our most popular in-the-hoop designs? Look no further!...Placemats - https://ww …Dec 14th 2023